Search along a route
Overview
This tutorial shows how to use TomTom Maps SDK for Android to create an application that helps a user find points of interest along a planned route.
It shows how to use:
- The TomTom Map SDK module to display a map, including markers with custom icons and balloons.
- The TomTom Routing SDK module to plan routes with and without waypoints.
- The TomTom Search SDK module to search for points of interest (POIs) and to geocode map positions.
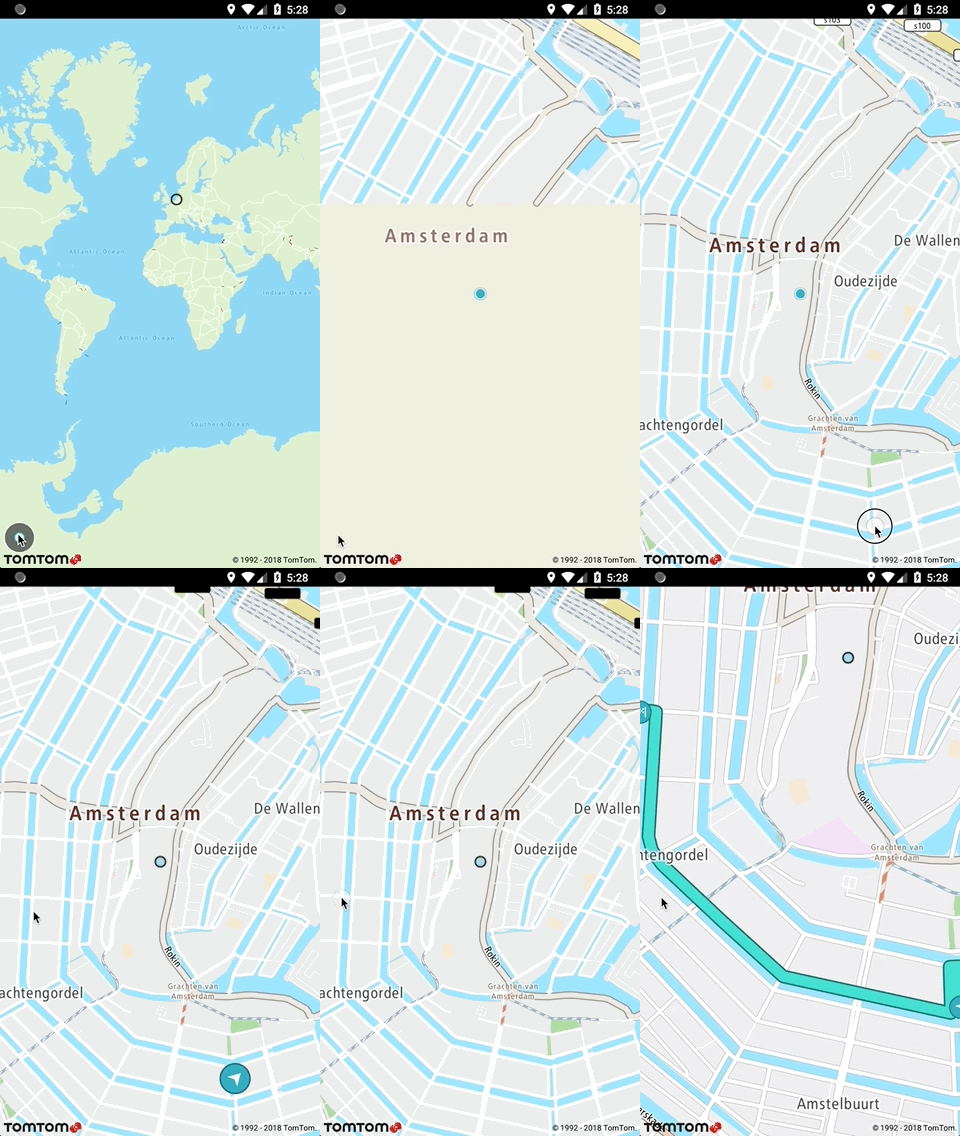
An end user can start interacting with the application by planning a route with departure and destination points. One long click on the map sets a departure point. A second long click sets a destination point and draws a route between those two points on the map.
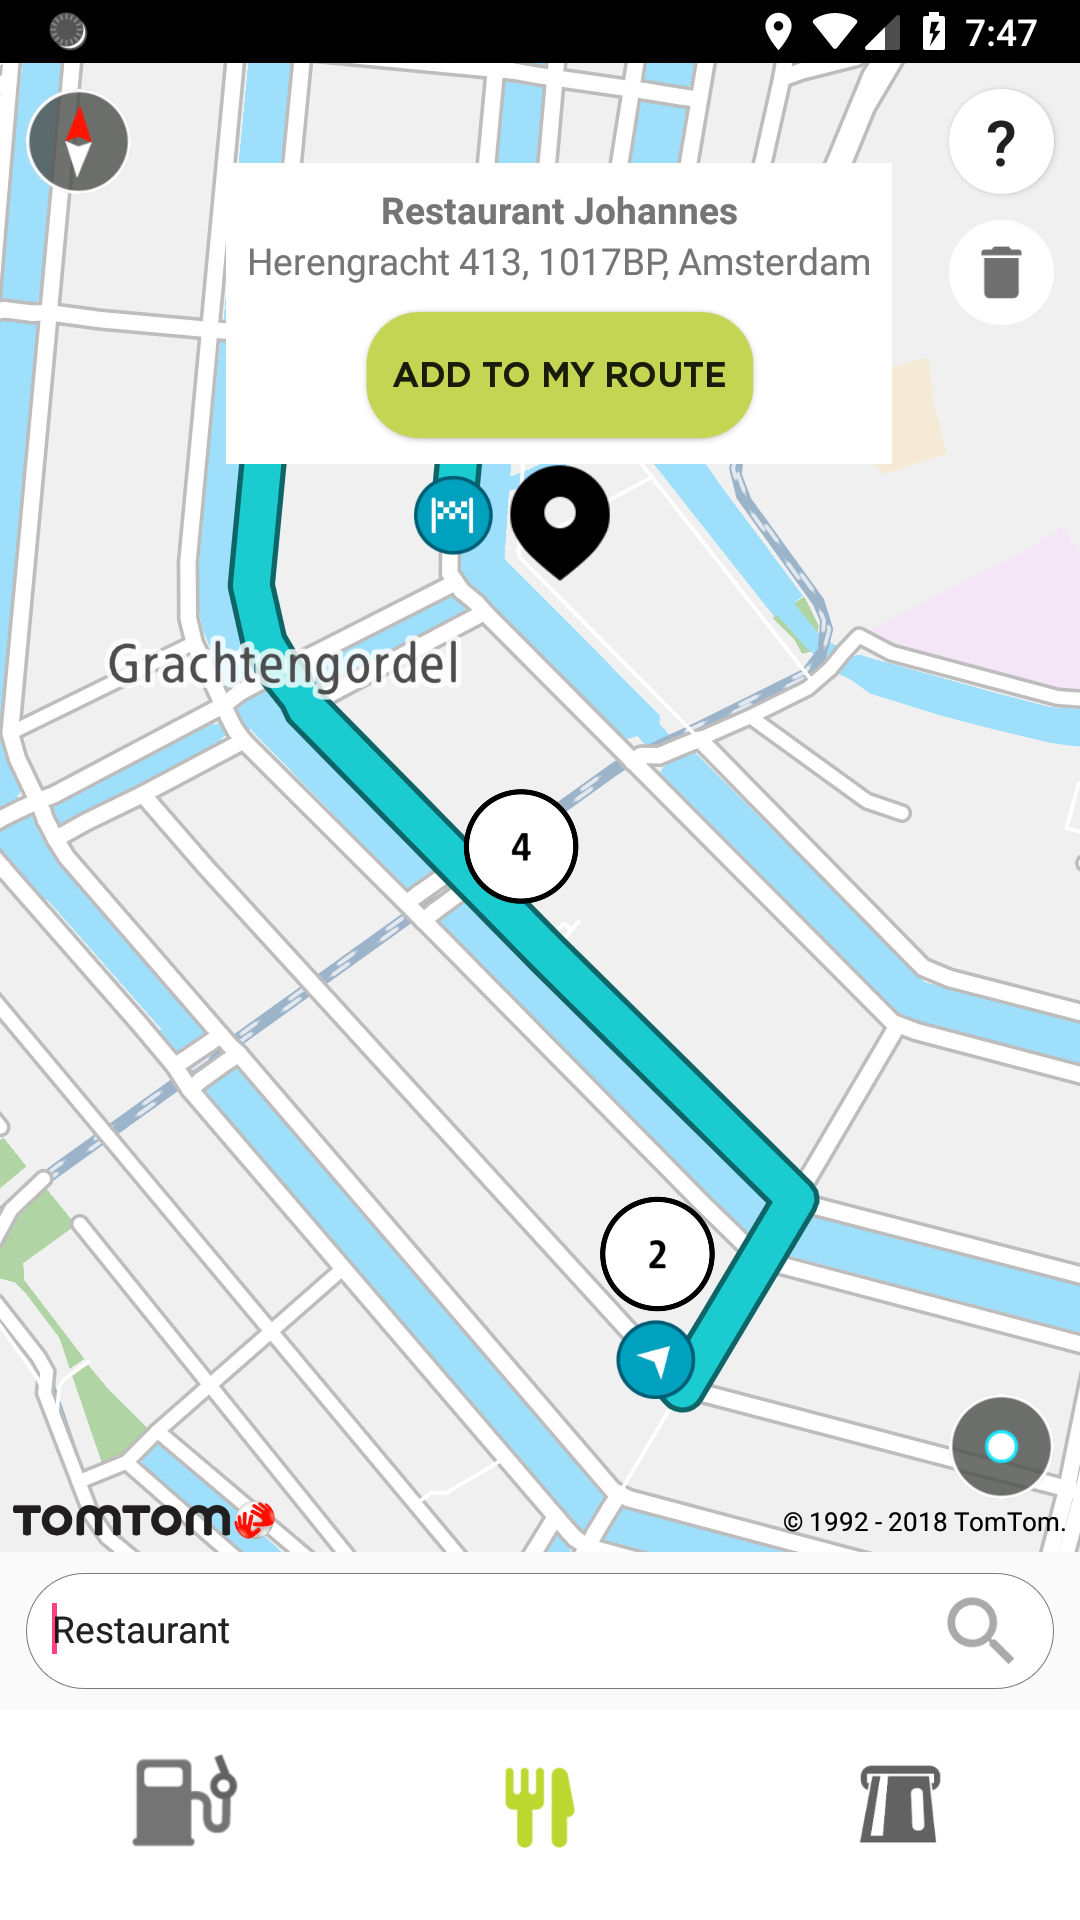
When the route is visible on the map, the user can type a POI name or category into a search field or click on any of the predefined POI category buttons (gas station, restaurant, ATM). The map displays markers for POIs that match the user's request. The user can add one of the displayed POIs to their planned route by clicking the marker on the map and choosing the "Add to my route" button inside the marker balloon that is then displayed. The route is recalculated and redrawn to include the selected point.
Prerequisites:
- Create a new project (minimum SDK API 23 – Android 6.0 “Marshmallow”) with an Empty Activity named MainActivity. Make sure that the AndroidX artifacs option is enabled.
- In the build.gradle project file, add the TomTom repository to the list of repositories. The
TomTom Maps SDK dependencies are downloaded from there.
1allprojects {2 repositories {3 google()4 jcenter()5 maven {6 url "https://repositories.tomtom.com/artifactory/maps-sdk-legacy-android"7 }8 }9}
- In the app/build.gradle file, inside the “android” section add support for the Java 1.8
features.
1android {2 compileOptions {3 sourceCompatibility JavaVersion.VERSION_1_84 targetCompatibility JavaVersion.VERSION_1_85 }6(...)
- In the app/build.gradle file, add dependencies to the TomTom Map, Search and Routing SDK
modules along with android support libraries.
1dependencies {2 implementation fileTree(dir: 'libs', include: ['*.jar'])3 implementation 'androidx.appcompat:appcompat:1.1.0'4 implementation 'androidx.core:core:1.2.0'5 implementation 'androidx.legacy:legacy-support-v4:1.0.0'6 implementation 'androidx.vectordrawable:vectordrawable-animated:1.1.0'7 implementation 'androidx.media:media:1.1.0'8 implementation 'androidx.constraintlayout:constraintlayout:1.1.3'9 implementation 'com.tomtom.online:sdk-maps:2.4782'10 implementation 'com.tomtom.online:sdk-routing:2.4782'11 implementation 'com.tomtom.online:sdk-search:2.4782'12 implementation 'com.tomtom.online:sdk-maps-ui-extensions:2.4782'13}
- If you don't have an API key visit a How to get a TomTom API key site and create one.
- Create a build config fields with the API keys, which will be used later in the application:
1android {2 compileSdkVersion 293 defaultConfig {4 buildConfigField("String", "MAPS_API_KEY", "\YOUR_KEY\")5 buildConfigField("String", "ROUTING_API_KEY", "\YOUR_KEY\")6 buildConfigField("String", "SEARCH_API_KEY", "\YOUR_KEY\")7 (...)
- Create a file named dimens.xml inside your res/values directory. Add the dimension values of
you UI components to it.
1<resources>2 <dimen name="size_none">0dp</dimen>3</resources>
Map initialization
To initialize a TomTom map, add a com.tomtom.onlinesdk.map.MapFragment fragment into the main
ConstraintLayout section of the activity_main.xml file.
1<?xml version="1.0" encoding="utf-8"?>2<androidx.constraintlayout.widget.ConstraintLayout xmlns:android="http://schemas.android.com/apk/res/android"3 xmlns:app="http://schemas.android.com/apk/res-auto"4 xmlns:tools="http://schemas.android.com/tools"5 android:layout_width="match_parent"6 android:layout_height="match_parent"7 tools:context=".MainActivity">89 <fragment10 android:id="@+id/mapFragment"11 android:name="com.tomtom.online.sdk.map.MapFragment"12 android:layout_width="match_parent"13 android:layout_height="@dimen/size_none"14 app:layout_constraintBottom_toBottomOf="parent"15 app:layout_constraintEnd_toEndOf="parent"16 app:layout_constraintStart_toStartOf="parent"17 app:layout_constraintTop_toTopOf="parent" />1819</androidx.constraintlayout.widget.ConstraintLayout>
You can start adding event handlers to the map only after it is fully initialized. To test if the
map is ready, the MainActivity class should implement an OnMapReadyCallback interface.
Then implement an OnMapLongClickListener interface to provide a callback method for long click
events on the map.
Add a initTomTomServices method to part of the MainActivity class where Map Display API modules
are initialized. At the same time, add a initUIViews method and a setupUIViewListeners method
where User Interface (UI) elements are initialized.
Run your application. You should see a map.
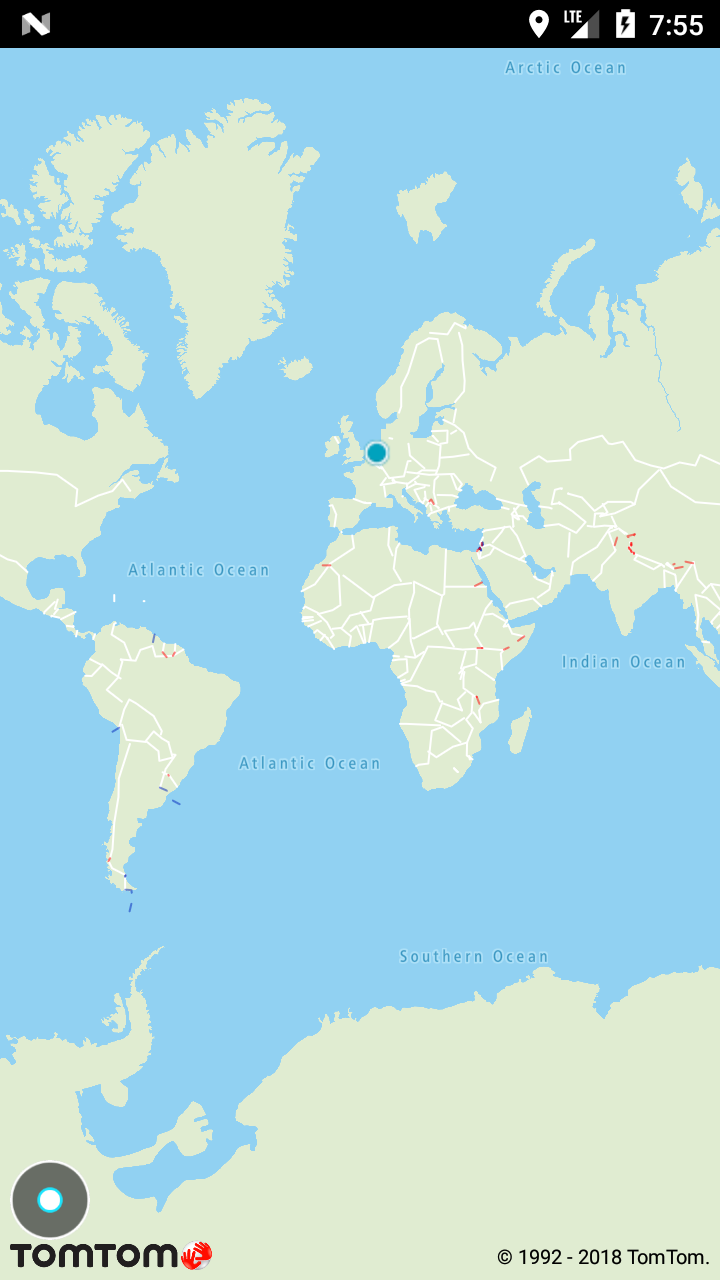
The TomTom map handles zooming, panning, rotating and double tapping gestures. In this application you need to add additional map interactions including location handling, long map click events, drawing routes and markers.
Add a private field for the TomTom map object inside the MainActivity class:
and initialize it in the onMapReady callback.
Override the onRequestPermissionsResult method so that permission callbacks from activities are
forwarded to the tomtomMap object.
After the onMapReady callback is executed from the Maps SDK, the tomtomMap object is ready to be
used. Now you can register your own map event listeners.
Drawing a route on the map
Drawing a route on the map requires that the following additional private fields be defined in the MainActivity class:
- RoutingApi
- SearchApi (here used for reverse geocoding of a map position to a valid address)
- Calculated route
- Departure coordinates
- Destination coordinates
- Waypoint coordinates
Then initialize the TomTom Search and Routing services by adding the following to
the initTomTomServices method:
Initialize icons for departure and destination positions inside the initUIViews method.
You need a clearMap function, where all the markers and the route are removed from the map.
Update the res/values/strings.xml file by adding strings:
<string name="geocode_no_results">No geocoder results. Choose different location and try again.</string><string name="api_response_error">API response error: \'%1\'.</string>
Now you can add an implementation to the function that handles long click events on the map.
The handleLongClick function calls the searchApi's reverseGeocoding method. This method checks
if a road can be found in the place where a long click is registered on the map.
Method reverseGeocoding returns a RxJava Single<ReverseGeocoderSearchResponse> object, subscribe
on this object with DisposableSingleObserver<ReverseGeocoderSearchResponse>. When the Single is
finished, it emits either a single successful value or an error. If a successful value is emitted, a
method onSuccess is executed in the subscribing DisposableSingleObserver, otherwise an onError
method is executed.
If the reverse geocoding call is successful, the effect of the LongClick depends on context:
- The first long click on the map sets the
departurePositionobject. - A second long click sets the
destinationPositionobject and draws a route on the map. - A third long click removes any destination and departure markers and the route from the map.
Next add functions to send a route request to the Routing API and to draw a route from the response on the map.
The createRouteCalculationDescriptor method returns a RouteCalculationDescriptor object:
- With additional waypoints (if the wayPoints array is not equal to null).
- Without additional waypoints (if the wayPoints array is equal to null).
The createRouteSpecification method is using internally the createRouteCalculationDescriptor
method result and returns a RouteSpecification object.
The drawRouteWithWaypoints method calls the Routing API. If the response is successful, a route is
drawn on the map. If the API returns an error, a message is displayed on the screen.
Add a createMarkerIfNotPresent method to display a departure position marker if the destination
position is not set:
Now you can draw the route on the map by using long clicks in chosen locations.
Searching for POIs along the route
Add strings to res/values/strings.xml
1<string name="poi_name_key">poiName</string>2<string name="address_key">address</string>3<string name="poisearch_hint">Kind of place to add to your route</string>4<string name="no_search_results">No search results for \'%1\'. Please try another search term.</string>5<string name="add_to_my_route">Add to my route</string>
Add dimensions to res/values/dimens.xml
1<dimen name="layout_height_xlarge">60dp</dimen>2<dimen name="layout_height_xxlarge">80dp</dimen>3<dimen name="spacing_xtiny">5dp</dimen>4<dimen name="spacing_xsmall">8dp</dimen>5<dimen name="spacing_small">10dp</dimen>6<dimen name="text_size_small">12sp</dimen>7<dimen name="text_size_normal">14sp</dimen>
Add colors to res/values/colors.xml
<color name="bg_balloon_button_color">#C3D552</color>
Use the searchApi object that was created earlier to search for a POI to add to the existing route. Modify the _ activity_main.xml_ layout file by adding a search field and its button.
1<?xml version="1.0" encoding="utf-8"?>2<androidx.constraintlayout.widget.ConstraintLayout xmlns:android="http://schemas.android.com/apk/res/android"3 xmlns:app="http://schemas.android.com/apk/res-auto"4 xmlns:tools="http://schemas.android.com/tools"5 android:layout_width="match_parent"6 android:layout_height="match_parent"7 tools:context=".MainActivity">89 <fragment10 android:id="@+id/mapFragment"11 android:name="com.tomtom.online.sdk.map.MapFragment"12 android:layout_width="match_parent"13 android:layout_height="@dimen/size_none"14 app:layout_constraintBottom_toTopOf="@+id/layout_edittext"15 app:layout_constraintEnd_toEndOf="parent"16 app:layout_constraintStart_toStartOf="parent"17 app:layout_constraintTop_toTopOf="parent" />1819 <androidx.constraintlayout.widget.ConstraintLayout20 android:id="@+id/layout_edittext"21 android:layout_width="@dimen/size_none"22 android:layout_height="@dimen/layout_height_xlarge"23 android:background="@color/white_fully_opaque"24 android:paddingBottom="@dimen/spacing_small"25 app:layout_constraintBottom_toBottomOf="parent"26 app:layout_constraintEnd_toEndOf="parent"27 app:layout_constraintStart_toStartOf="parent">2829 <EditText30 android:id="@+id/edittext_main_poisearch"31 android:layout_width="@dimen/size_none"32 android:layout_height="@dimen/size_none"33 android:layout_marginStart="@dimen/spacing_small"34 android:background="@android:color/transparent"35 android:hint="@string/poisearch_hint"36 android:imeOptions="actionSearch"37 android:textSize="@dimen/text_size_normal"38 app:layout_constraintBottom_toBottomOf="parent"39 app:layout_constraintEnd_toStartOf="@+id/btn_main_poisearch"40 app:layout_constraintStart_toStartOf="parent"41 app:layout_constraintTop_toTopOf="parent"42 android:inputType="text" />4344 <ImageButton45 android:id="@+id/btn_main_poisearch"46 android:layout_width="wrap_content"47 android:layout_height="@dimen/size_none"48 android:layout_marginEnd="@dimen/spacing_small"49 android:layout_marginTop="@dimen/spacing_xtiny"50 android:adjustViewBounds="true"51 android:background="@android:color/transparent"52 app:layout_constraintEnd_toEndOf="parent"53 app:layout_constraintTop_toTopOf="parent"54 app:srcCompat="@android:drawable/ic_menu_search" />55 </androidx.constraintlayout.widget.ConstraintLayout>56</androidx.constraintlayout.widget.ConstraintLayout>
Then add behaviors to the newly created controls. Add private fields for the search button and text field in the MainActivity class
private ImageButton btnSearch;private EditText editTextPois;
and initialize them in the initUIViews method.
1btnSearch = findViewById(R.id.btn_main_poisearch);2editTextPois = findViewById(R.id.edittext_main_poisearch);3//we are using Kotlin Android Extensions
After initializing the search button, add a listener inside the setupUIViewListeners method to
receive events when the button is clicked.
View.OnClickListener searchButtonListener = getSearchButtonListener();btnSearch.setOnClickListener(searchButtonListener);
btn_main_poisearch.setOnClickListener(searchButtonListener)
Add a method to create a search button listener.
The getSearchButtonListener method creates a View.OnClickListener object.
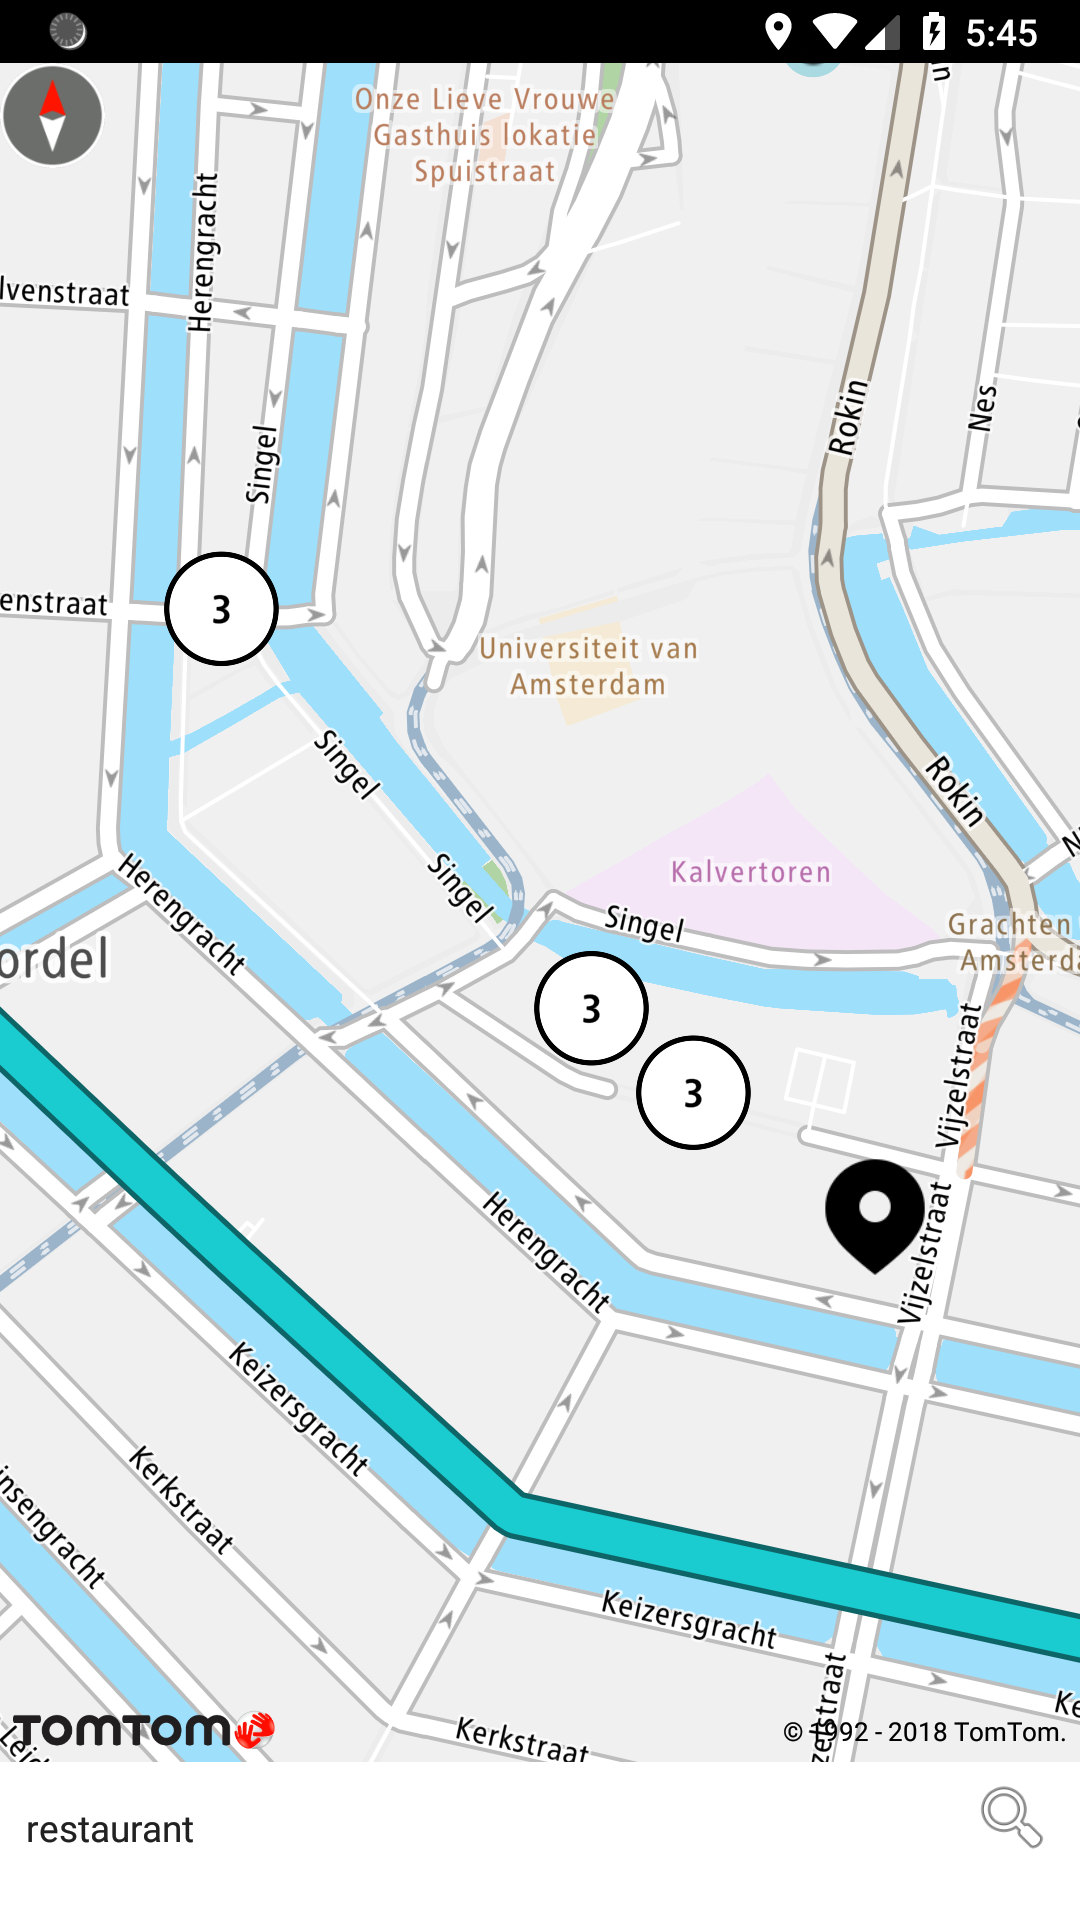
The searchAlongTheRoute function in this object executes a search query for the provided search
term along the displayed route. The createAndDisplayCustomMarker method then adds a map marker in
the position returned by the search query, including the name and address of the POI.
Adding custom marker balloons
Add a file with a rounded button shape named bg_balloon_button.xml to the res/drawables folder. This adds the styling to the buttons in the marker balloons.
1<?xml version="1.0" encoding="utf-8"?>2<shape xmlns:android="http://schemas.android.com/apk/res/android"3 android:shape="rectangle" android:padding="10dp" >4 <solid android:color="@color/bg_balloon_button_color" />5 <corners android:radius="20dp" />6</shape>
To create a custom layout, add a file named marker_custom_balloon.xml inside the res/layout directory.
1<?xml version="1.0" encoding="utf-8"?>2<androidx.constraintlayout.widget.ConstraintLayout xmlns:android="http://schemas.android.com/apk/res/android"3 xmlns:app="http://schemas.android.com/apk/res-auto"4 android:layout_width="wrap_content"5 android:layout_height="wrap_content"6 android:background="@android:color/white">78 <Button9 android:id="@+id/btn_balloon_waypoint"10 android:layout_width="wrap_content"11 android:layout_height="wrap_content"12 android:layout_marginBottom="@dimen/spacing_small"13 android:layout_marginEnd="@dimen/spacing_small"14 android:layout_marginStart="@dimen/spacing_small"15 android:layout_marginTop="@dimen/spacing_small"16 android:background="@drawable/bg_balloon_button"17 android:paddingBottom="@dimen/spacing_xtiny"18 android:paddingLeft="@dimen/spacing_small"19 android:paddingRight="@dimen/spacing_small"20 android:paddingTop="@dimen/spacing_xtiny"21 android:text="@string/add_to_my_route"22 android:textAlignment="center"23 android:textSize="@dimen/text_size_small"24 android:textStyle="bold"25 app:layout_constraintBottom_toBottomOf="parent"26 app:layout_constraintEnd_toEndOf="parent"27 app:layout_constraintStart_toStartOf="parent"28 app:layout_constraintTop_toBottomOf="@+id/textview_balloon_poiaddress" />2930 <TextView31 android:id="@+id/textview_balloon_poiname"32 android:layout_width="wrap_content"33 android:layout_height="wrap_content"34 android:layout_marginEnd="@dimen/spacing_xsmall"35 android:layout_marginStart="@dimen/spacing_xsmall"36 android:layout_marginTop="@dimen/spacing_xsmall"37 android:textStyle="bold"38 app:layout_constraintEnd_toEndOf="parent"39 app:layout_constraintStart_toStartOf="parent"40 app:layout_constraintTop_toTopOf="parent" />4142 <TextView43 android:id="@+id/textview_balloon_poiaddress"44 android:layout_width="wrap_content"45 android:layout_height="wrap_content"46 android:layout_marginEnd="@dimen/spacing_xsmall"47 android:layout_marginStart="@dimen/spacing_xsmall"48 app:layout_constraintEnd_toEndOf="parent"49 app:layout_constraintStart_toStartOf="parent"50 app:layout_constraintTop_toBottomOf="@id/textview_balloon_poiname" />51</androidx.constraintlayout.widget.ConstraintLayout>
The marker_custom_balloon layout displays a balloon above a map marker that the user has clicked. This balloon has two text fields to display an address and a POI name are displayed, plus a button to add the POI to the existing route.
Finally, add a method createCustomViewAdapter that returns a
custom SingleLayoutBalloonViewAdapter adapter object.
Use the marker_custom_balloon layout as an argument for the adapter object. Then override
the onBindView method inside the adapter to fill in the marker balloon layout fields. Then
implement a btnAddWayPoint onClick event inside the adapter. This events executes a setWayPoint
method and recalculates the route to include the marker that the user has clicked.
Use above method inside the onMapReady function to set a marker balloon view adapter.
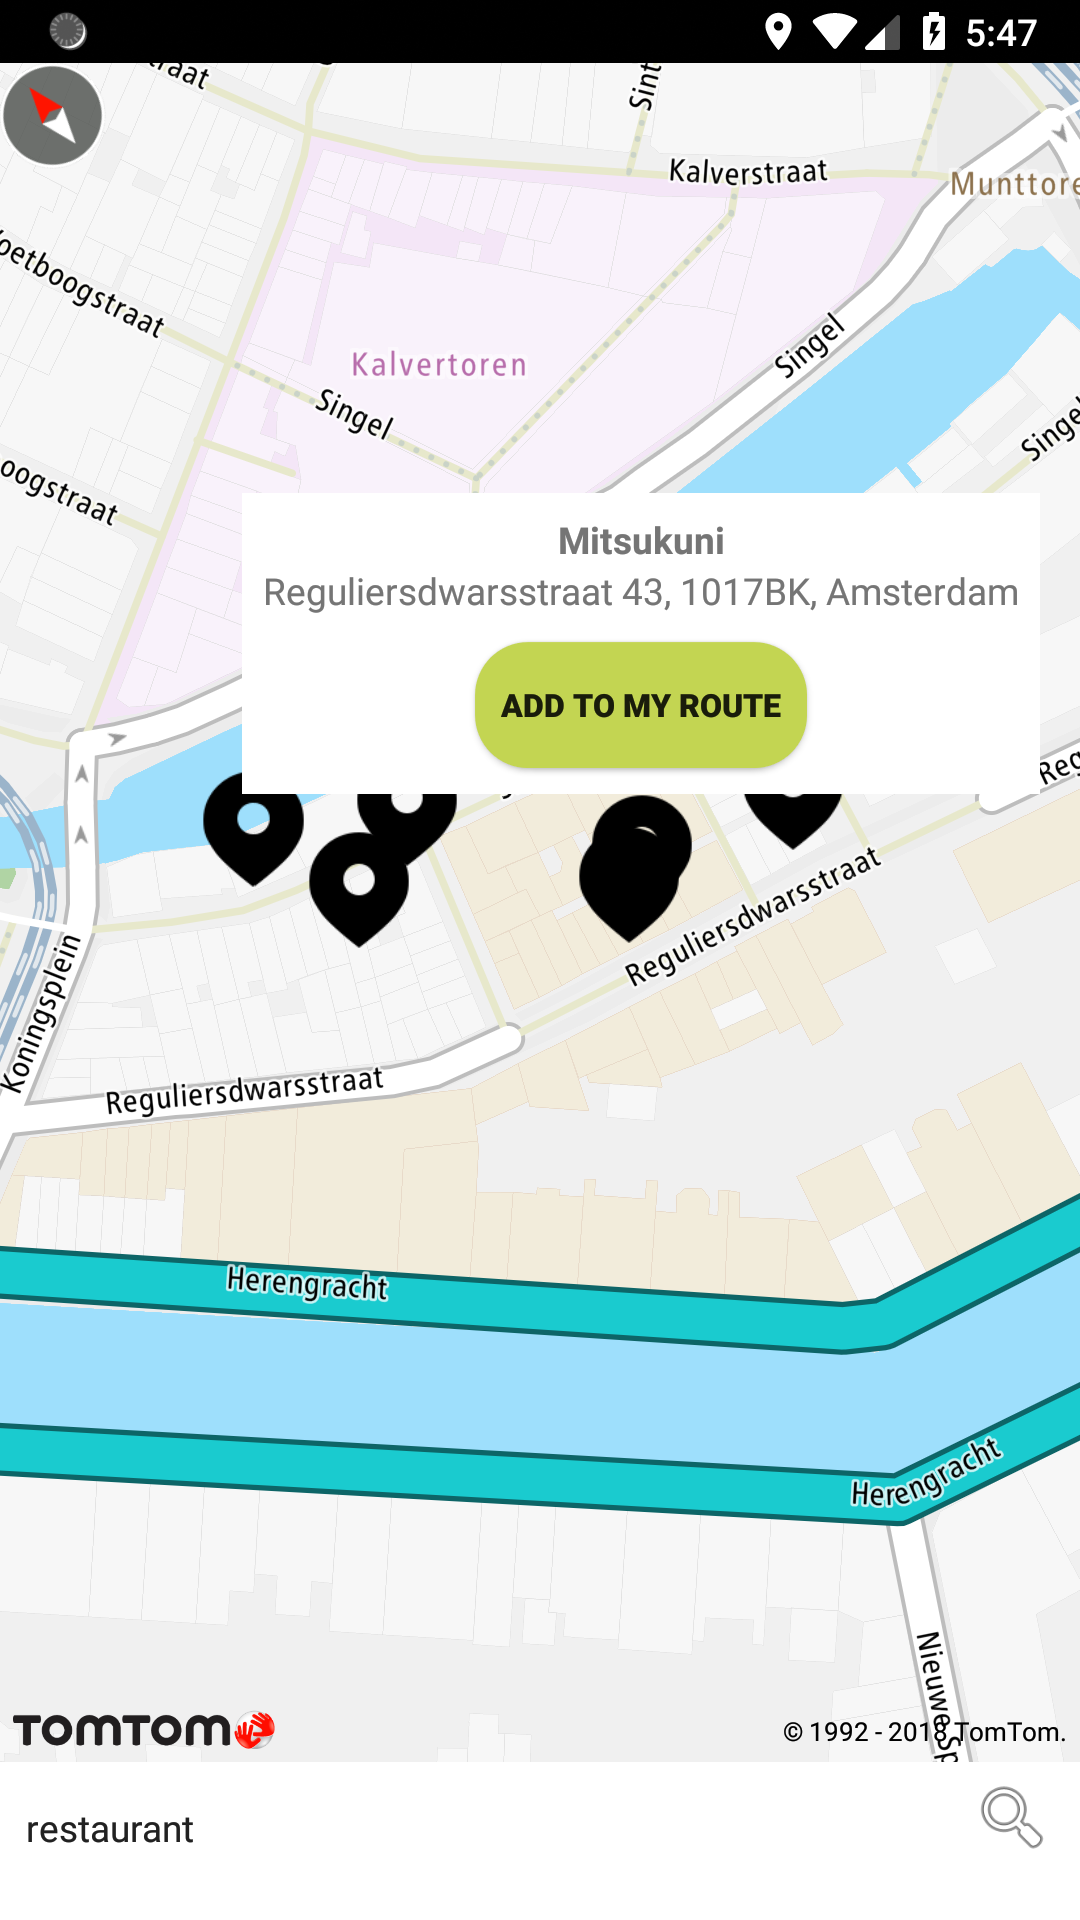
Now you should have a fully working application where you can:
- Display a map.
- Create a route between 2 points.
- Display points of interest.
- Add a single POI to your route.
The additional styling, shortcut buttons, and help screen in the application screenshots are not a part of this tutorial. You can find them, along with all the icons and images used in this tutorial, in the application posted on github.
Summary
This tutorial explained how to create a sample application that searches for and displays points of interest along a route, then replans the route to include one of those POIs.
This application can be extended with other TomTom Maps SDK functions, such as displaying information about traffic and travel distances.
Happy coding!
Example application
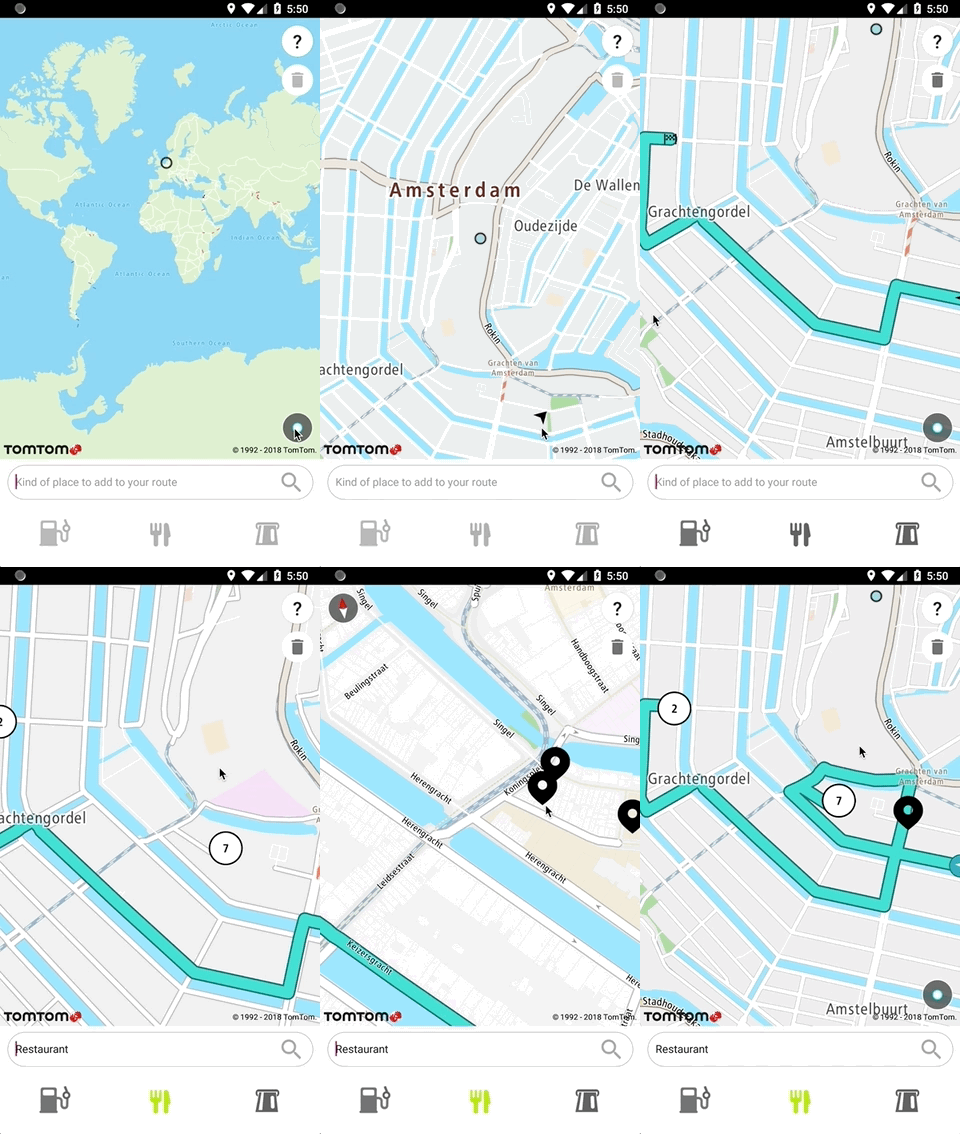
The full application, including additional layout changes and improvements, is visible below. It
uses a ConstraintLayout with a search field and a button for its main layout. At the bottom of the
screen there are also three optional buttons that can be used for quick searches for gas stations,
restaurants, and ATMs. There is a help button in the top right corner along with a clear button to
remove the route and any markers from the map.
